Welcome back to another series of "beau experiments with SharePoint Field Customizers". If you saw my last post you'd see that I have been experimenting with SharePoint Framework Field Customizers (in preview). In this tutorial I wanted to augment the OOTB person field by rendering more relevant content about the user specified on the list item.

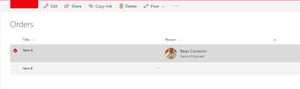
Here is the end result of this tutorial.
This post will be quite simple and you'll be able to implement the same exact thing in a matter of minutes! First, let's start by creating a SPFx Field Customizer using this turotial.
The second step will be to create a list in your site with a person/group field. In my scenario, I have created a field called Person. If I were to populate the data now with my user, the view would be showing this by default.
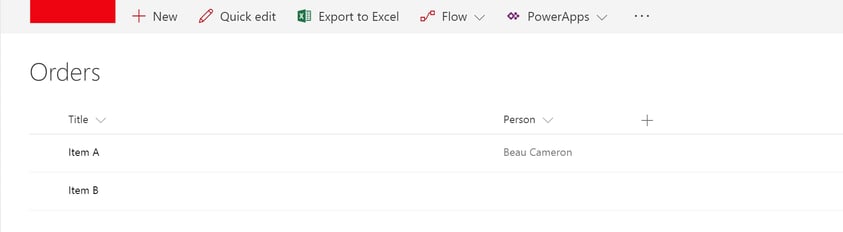
Notice how the the display of the person field is far different from the first picture in this blog post. What we are going to achieve, is by using the React Persona component, we can easily and quickly change our boring Person field to include the user's photo, their name and their job title!
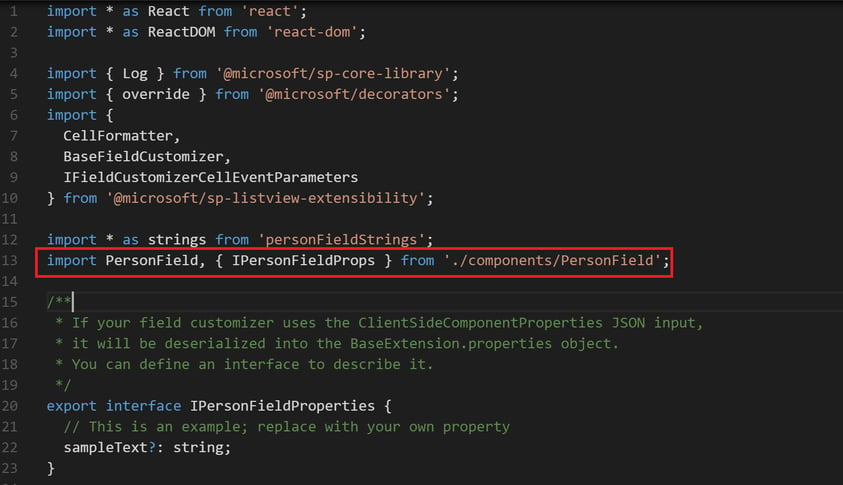
After you've set up your solution, notice how a React TSX component was already built for us within the /components folder and already imported for us here.
Let's open up that React component and start implenting the React Persona component. First thing to do, is import the React components.
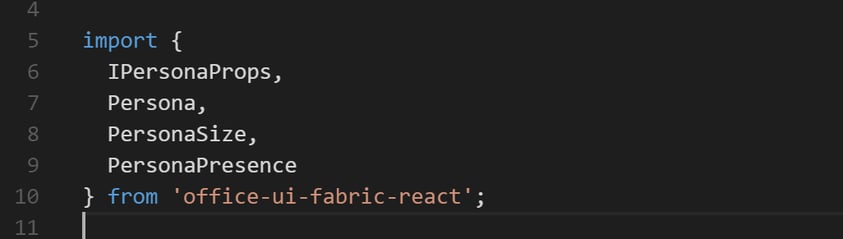
Importing these into our solution will allow us to use the Office Fabric UI React Persona component. To make things a bit more clear, I am going to show you all the code you need to implement to build out this person card.
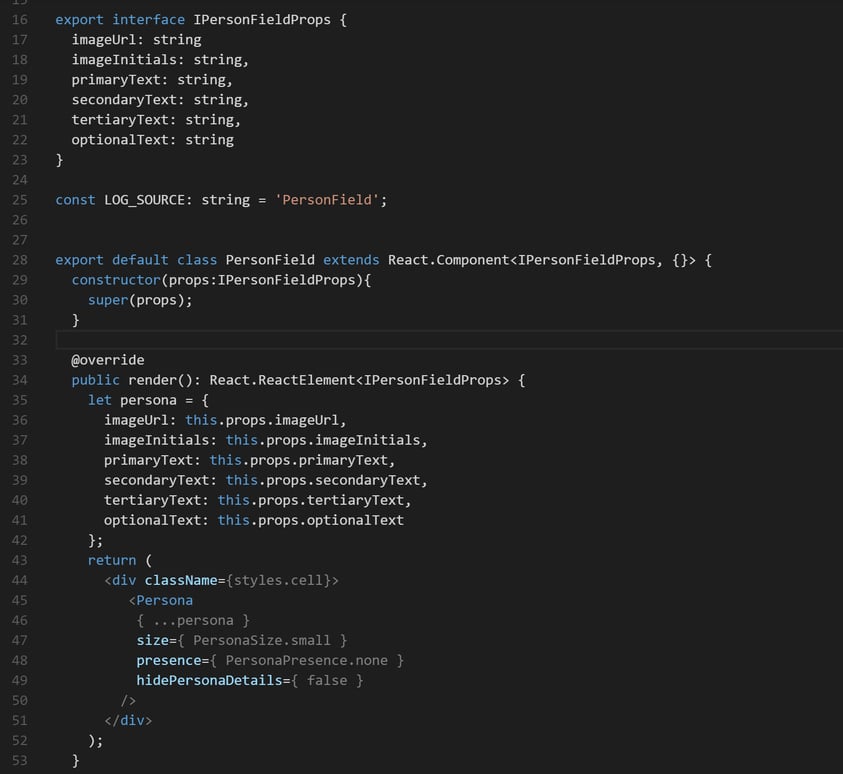
A couple things to note:
1. Notice how I have built an Interface to contain my properties for the Persona Card. It includes the following properties; imageUrl, imageInitials,primaryText,secondaryText,tertiaryText,optionalText. These properties are being passed into our component.
2. I am creating a variable called persona to store all of these values as they are passed in -- you do not need to do this, in fact there is no reason to explicitly do this, as the component properties could be used directly on the Persona React component.
3. I set hidePersonaDetails to false. This is an attribute on the component OOTB that allow you to specify whether or not to render details such as jobtitle or presence among other things.
Let's take a look how properties will be passed into this component.
If you switch back to your Field Customizer TypeScript file, locate the onCellRender() function. In case it wasn't clear, this is the function that is called when the field is being rendered in our view. Essentially, we want to augment this function to change the cell value to now use our Persona component w/ properties.
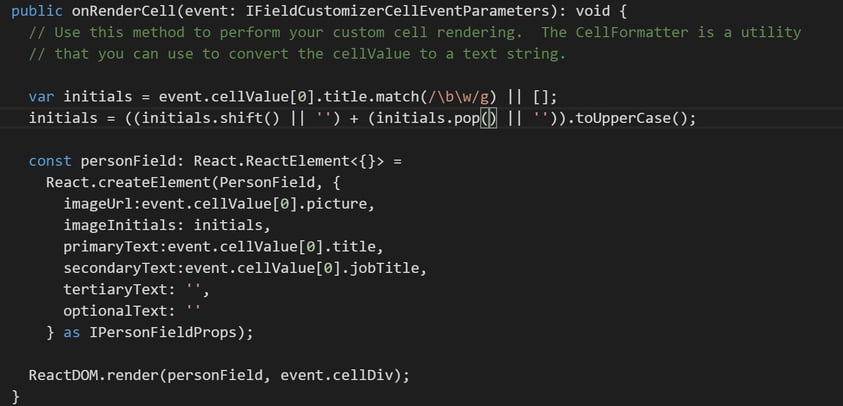
Note the following:
1. I have created some code to parse out the initials of the user's name in that person field. This is because if the current user do not have a photo, it will default to show a circle with the initials of the user (similar to how Office 365 groups are represented)
2. The only other change from the default onCellRender is where I am passing values into createElement which come from the cell's value of the field. For a person field, we have access to the user's picture url, their name, their job title and also their department! So in this case, I am just grabbing these values from the cell and passing them as properties into our PersonField React Component we created earlier.
3. Tell React to render our new component in this cell using ReactDOM.render(personField,event.cellDiv).
Finally, we just have to hit our list using that ugly field customizer url and pass in the id of our field customizer (from the manifest.json file). In my scenario, my url would be
https://mytenant.sharepoint.com/Field-Customizers/Lists/Orders/AllItems.aspx?loadSPFX=true&debugManifestsFile=https://localhost:4321/temp/manifests.js&fieldCustomizers={"Person":{"id":"a2a08e11-d478-43d3-9eef-66f049b4325c","properties":{}}}
The end result

This will not break quick edit mode. When quick edit mode shows up, the image will be present. The moment you click into the Person field, you'll be able to modify the person field and change the value.
I hope you enjoyed this little tutorial. While it's not super complicated, I think it shows just how simple creating field customizers really are! In the future, we could easily augment this field customizer to allow a user to email the user in this field or even add a hover to show more properties about this user. The possibilities are endless.
Source Code can be found here: Github
Share