
In the fast-paced digital landscape, efficiency and productivity are key to business success. Automating tasks can significantly enhance these aspects, freeing up valuable time for your team to focus on strategic initiatives. Microsoft Azure Logic Apps is an excellent tool for creating automated workflows between your apps, data, services, and systems. In this blog post, we will provide a step-by-step guide to creating an automated workflow with Azure Logic Apps.
How does it work?
In simple terms, a logic app is an action, followed by an action, followed by an action.
Pretty simple right? 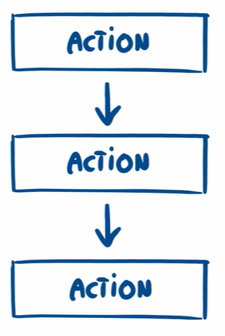
Of course, they are much more flexible than that and can be much more complex. For example, you can introduce an action, that is a condition, this condition can be not met, or met, and trigger different next actions. 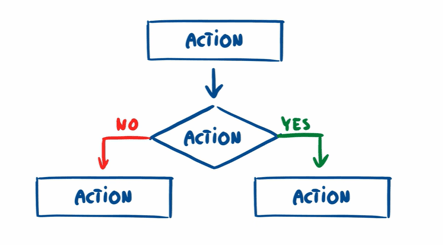
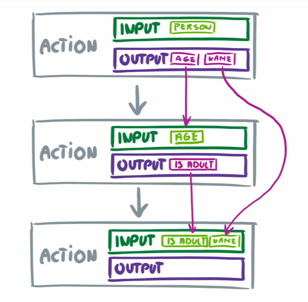
Let's go back to our basic example of three actions. Every action has an input and an output. Each output can be used as the next step input. You can also grab outputs from previous steps. This is a very powerful feature, allowing for a creation of more complex logic.
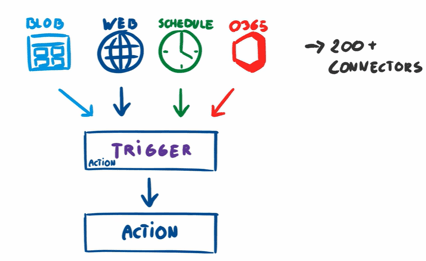
The first action in a logic app is called a trigger - this trigger evokes an entire flow. This can be from many different sources.
Let's consider a simple example with a web request.
We have a web request, a trigger that is based on the web request, followed by an action.
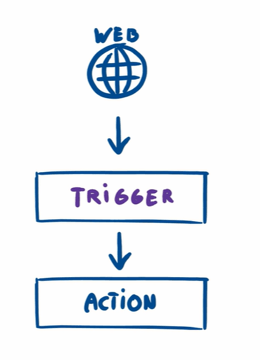
This is a simple logic app we can build.
A user that's going to be shooting to a web request to get a simple response. 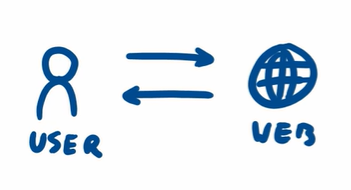
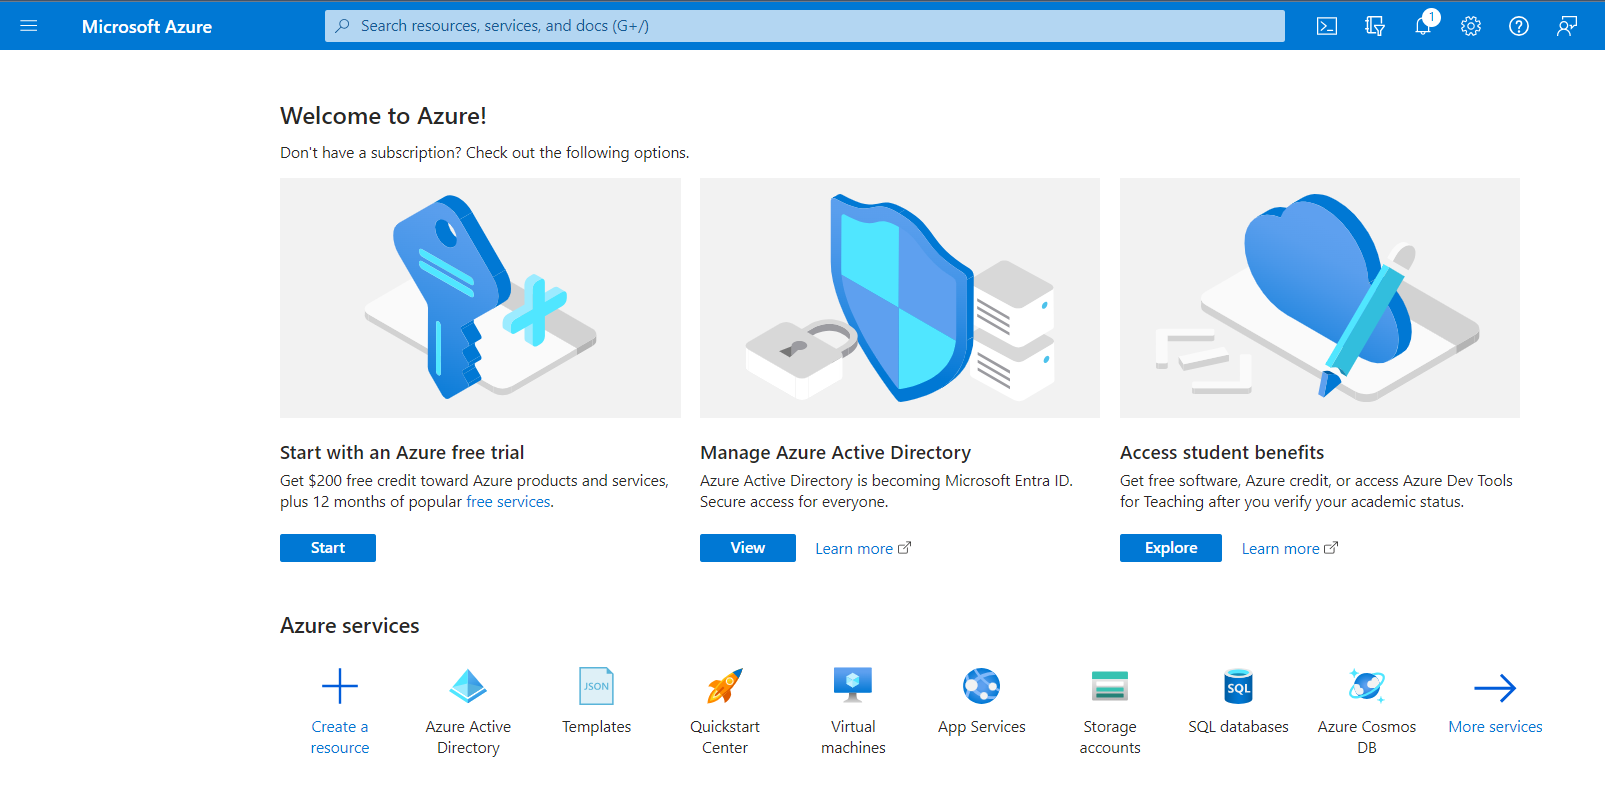
Step 1: Log in to Your Azure Account
The first step is to log into your Azure portal. If you don't already have an account, you can create one quickly and take advantage of a free 12-month trial.
Step 2: Create a Logic App
Once you're logged in, navigate to the "Create a resource" button.

Search for "Logic App," select it, and then click "Create."

You'll need to fill in details such as your subscription, resource group, logic app name, location, and log analytics, before clicking "Create."
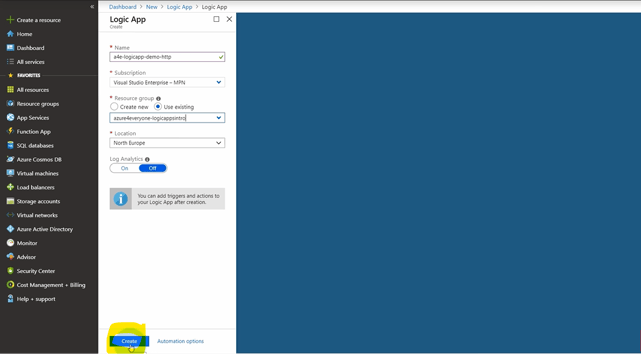
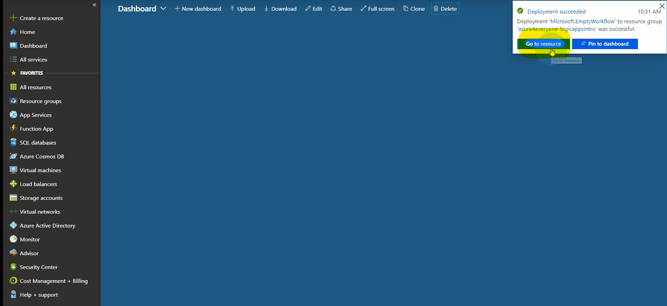
Provisioning of logic apps takes about 10 seconds.
Step 3: Design Your Workflow
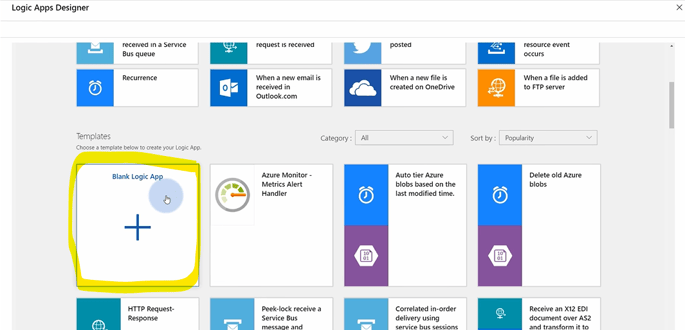
After the deployment is complete, go to the Logic App Designer.
Here, you will choose an event (trigger) to start your workflow. For instance, you may choose an event like receiving an email in Office 365.
In our example, we will choose a blank logic app.
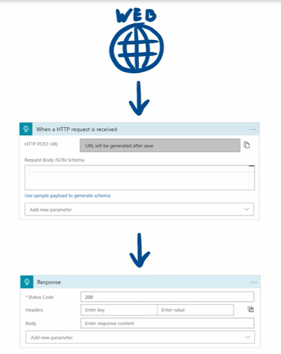
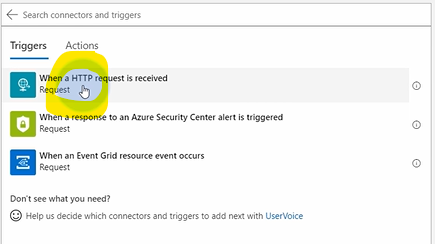
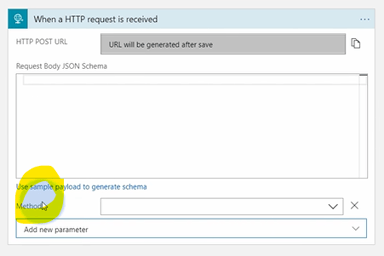
For the purposes of this demo, since we want to receive a web request, we will type in "request" -
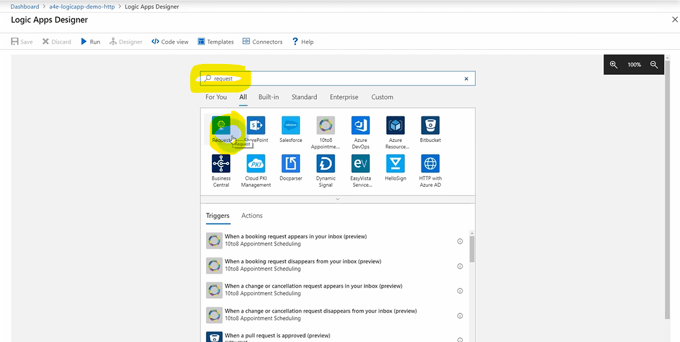
Now we need to specify what request is being received. In our case it'll be a http request
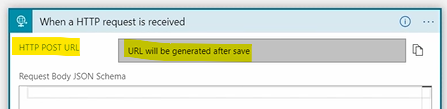
Notice the fields we have here -
- HTTP POST URL
- URL will be generated after save
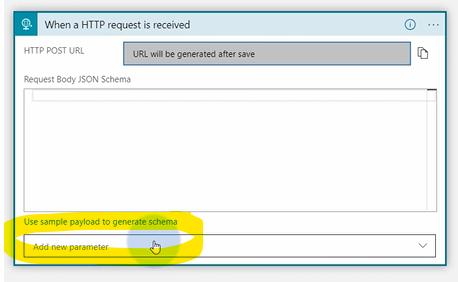
For our demo let's make it "get request" so we can actually post it into the browser.
Click "Add new parameter."
Select "Method"
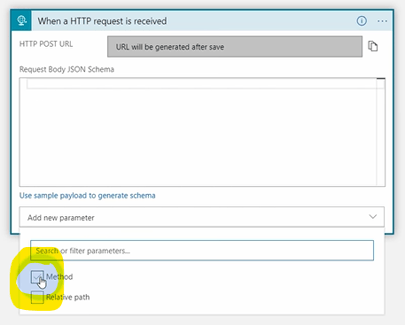
Click outside to have it populate a Method -
Select "GET" -
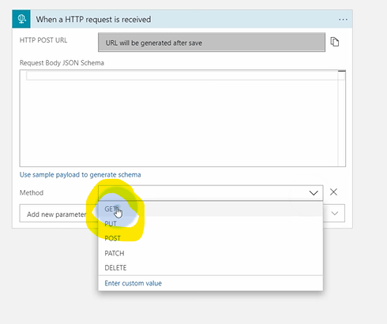
Now even though it says HTTP POST URL you will be able to evoke this by GET request.
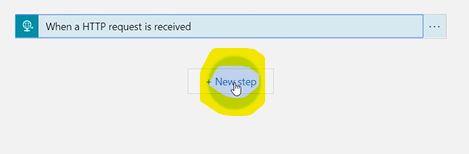
Next, define what action should follow the trigger. This could be anything from sending a notification to creating a task in Microsoft Planner. The Logic App Designer offers a simple, user-friendly interface with a wide variety of pre-built templates to get you started.
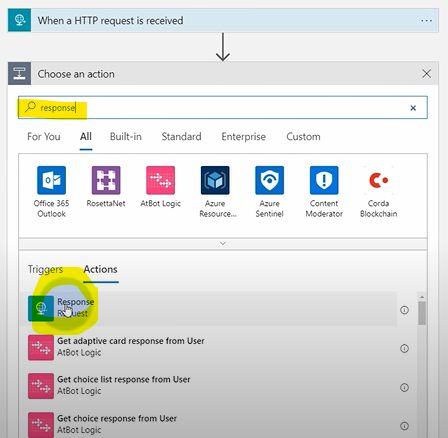
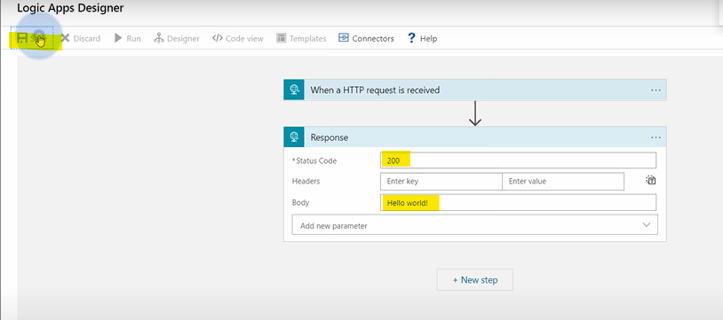
For our demo purposes we now need to respond, so type response. Notice we have a request response. This is an action that will respond to the user when the URL is hit.
Next let's create a response.
- Set Status Code to 200
- As a body, let's say "Hello world!"
- Hit save.
Step 4: Test and Run Your Workflow
Once you're satisfied with your automated workflow and have clicked Save. You can now test your app by hitting "Run."

Step 5: Monitor Your Logic App
Azure provides built-in monitoring tools to track the performance and status of your Logic Apps. You can view the details of each run, including the status, start time, end time, and duration.
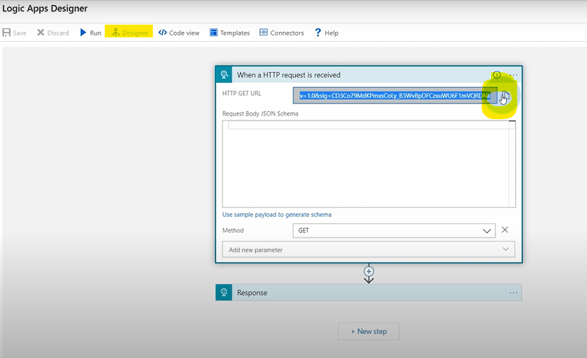
To see if what we built is working hit the "Designer" button next to Run and then grab the URL -
Open a new browser and paste the URL -
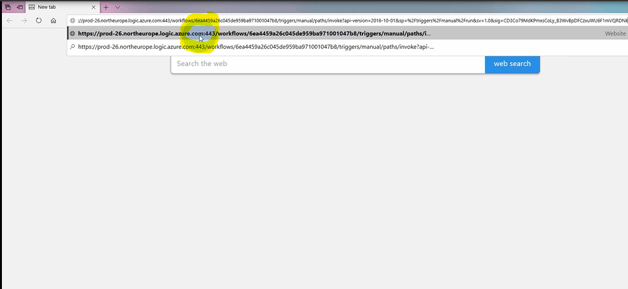
When you hit enter, you should see your body text -

Congrats! This means our flow is working!
Have any more questions? At Aerie, we're committed to helping our clients leverage the full potential of Azure. Our team of experts can guide you through the process of setting up Logic Apps and other Azure services, tailoring solutions to fit your unique business needs.
Microsoft Azure Logic Apps simplifies the process of setting up automated workflows, helping you streamline operations, improve productivity, and reduce manual errors. It's just one of many ways that Azure is transforming the way businesses operate.
Stay tuned to our blog for more insights and guides on leveraging Microsoft Azure to drive business growth and success.
Bonus: Did you know when you build a logic app it creates a code for the app? Check it out!

Connect with us today to learn more about our services.